The Image Swatch option in MultiVariants lets Shopify merchants display custom product choices as clickable image thumbnails. Use it for fabric patterns, finishes, styles, design themes, or other choices customers need to compare visually. You can allow one or multiple selections, upload an image for each choice, add optional prices, set a default choice, and control where the swatches appear on the product page.
If you are new to Product Options, first see how to set up Product Options in MultiVariants
Before you start: Make sure the product is included in the ruleset you are editing. The Image Swatch option will appear on products that the ruleset applies to.
Set Up a Image Swatch Option
Follow these steps to create an Image Swatch option:
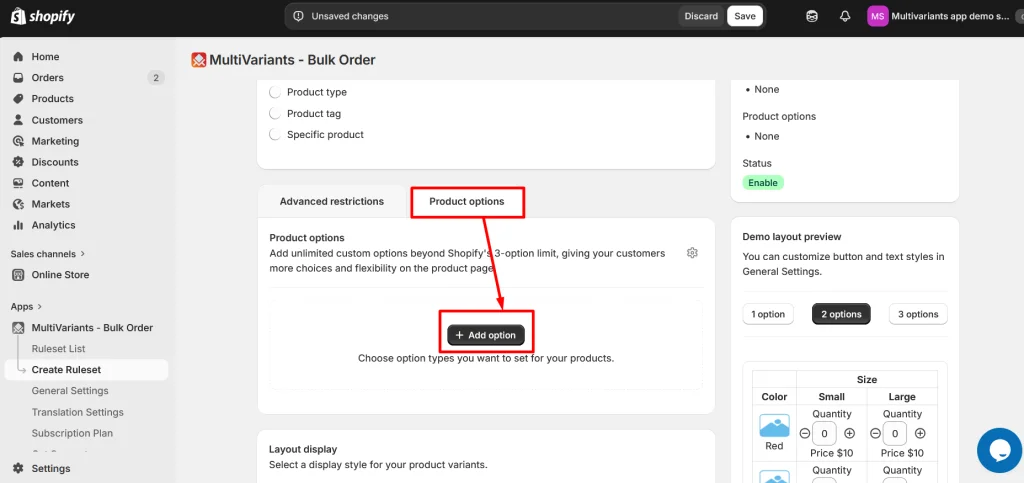
Open Product Options
>> Go to the MultiVariants dashboard, open an existing ruleset (or create a new one), open the Product Options tab at the bottom, and click “+ Add option“.
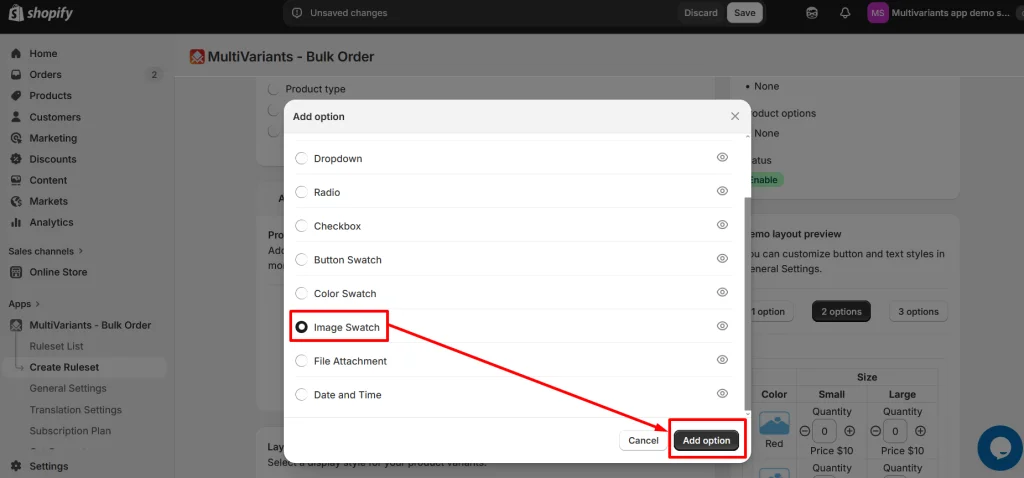
Select Image Swatch
>> Select Image Swatch and click Add option.
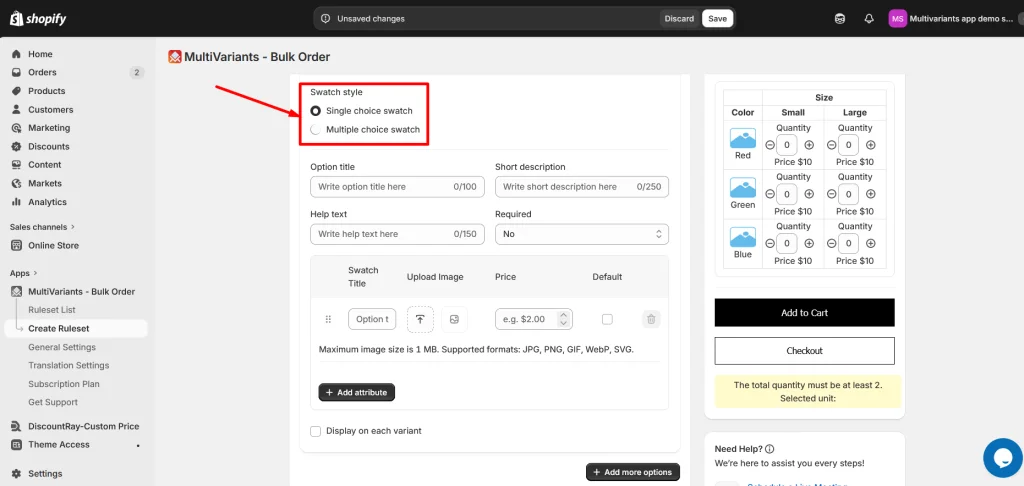
Choose Single or Multiple Selection
>> Choose how customers can select the image swatches:
Single choice swatch — customers can select only one image swatch.
Multiple choice swatch — customers can select multiple image swatches.
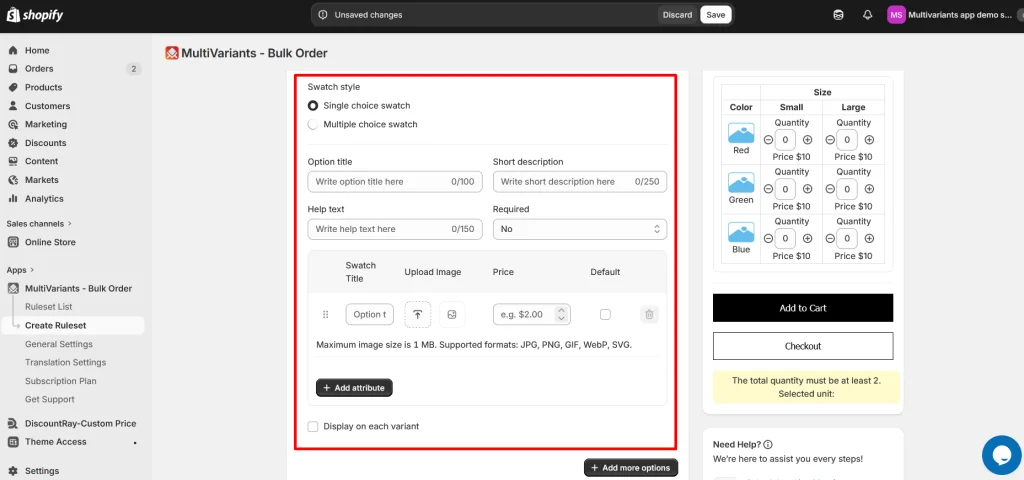
Configure the Image Swatch Settings
>> Configure the fields you need — only the ones you fill in will apply, the rest stay optional:
Option title — the label shown above the thumbnails, e.g. “Choose theme”.
Short description — add an optional short description to explain what customers should choose.
Help text — add optional instructions or supporting information below the image swatches.
Required — set to Yes if customers must select at least one image swatch before adding the product to the cart.
Display on each variant — leave unchecked to show one set of image thumbnails at the top of the bulk-order section, shared across all variants. Check it to repeat the thumbnails under each variant row.
Add Your Image Swatch Choices
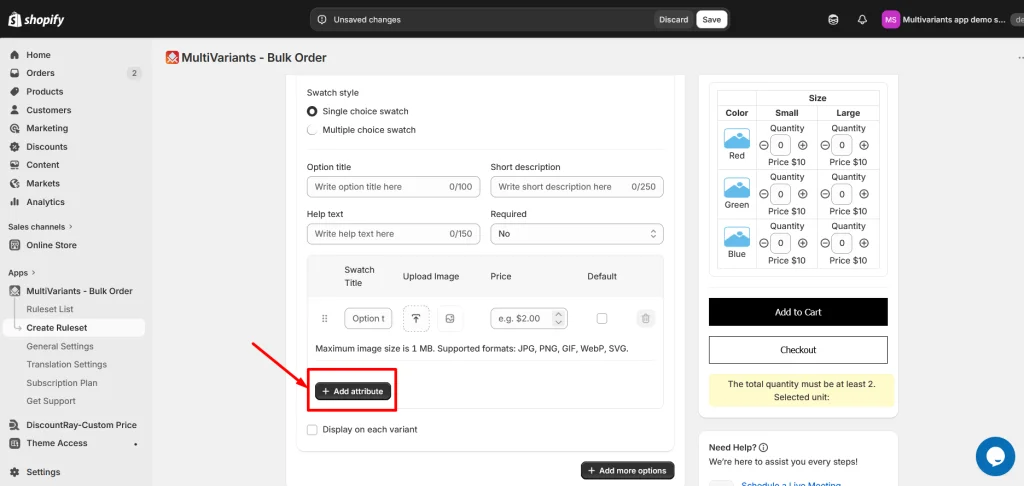
>> Add your image choices in the attribute table below the basic fields. Each row has the following columns:
Swatch Title — label for each thumbnail, e.g. “Theme 1” (max 100 characters).
Image — click the upload icon to upload a thumbnail (max 1 MB; JPG, PNG, GIF, WebP, SVG).
Price — enter an optional add-on price for this image swatch. Leave it blank if the choice should not add an extra charge.
Default — select the image swatch you want pre-selected when the product page loads.
Click + Add attribute to add another image choice. Drag the handle on the left of a row to change the order of the image swatches.
Save and Test the Image Swatch Option
>> Click Save in the top save bar.
Your Image Swatch option is now active on every product the ruleset applies to. Open a product page covered by the ruleset and test the setup. Confirm that the images display correctly, the single or multiple selection behavior works as expected, any add-on prices are applied correctly, and required selections are enforced.
Manage Image Swatch Placement and Styling
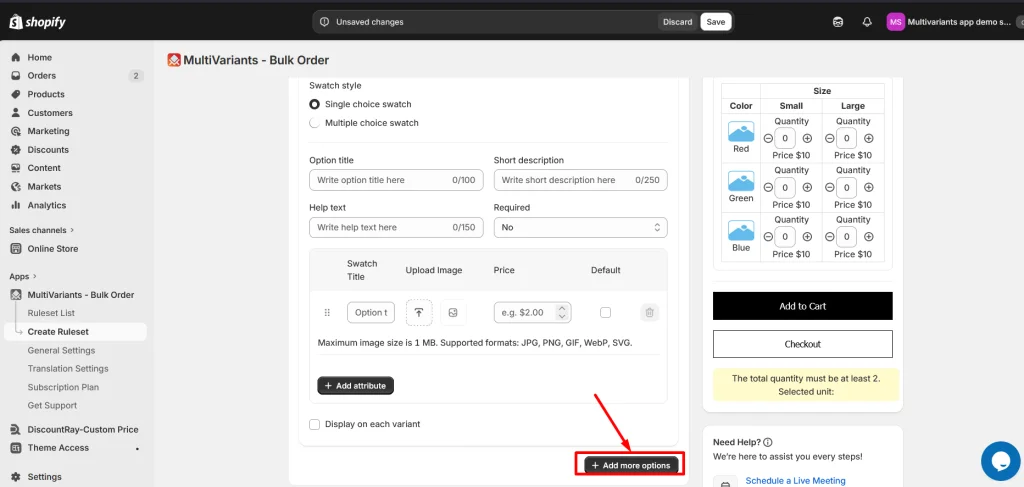
You can also add more options by clicking the + Add more options button, and adjust the design and placement of the option by following the steps below.
>> To add another option, click + Add more options at the bottom.
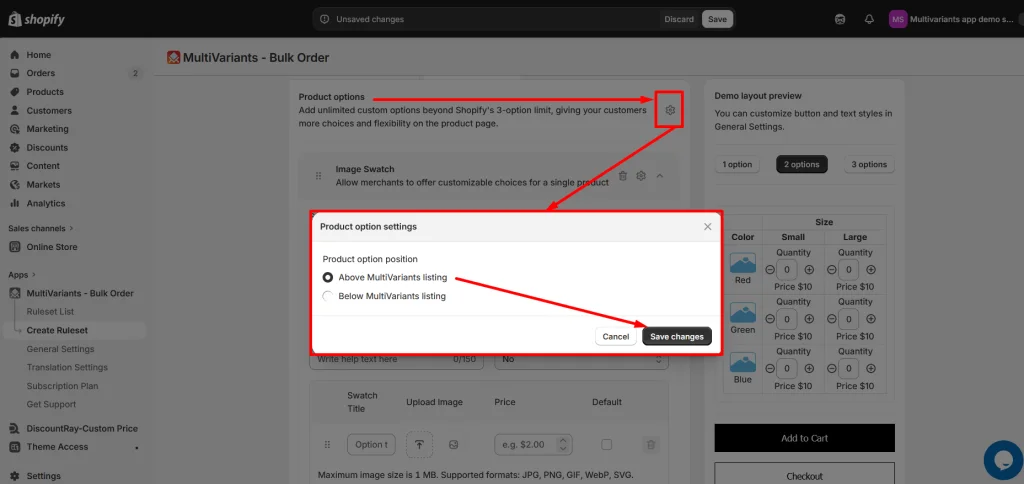
>> To choose where the Image Swatch option appears on the product page, click the small gear icon at the top of the Product Options tab, select Above or Below MultiVariants listing, and click Save changes.
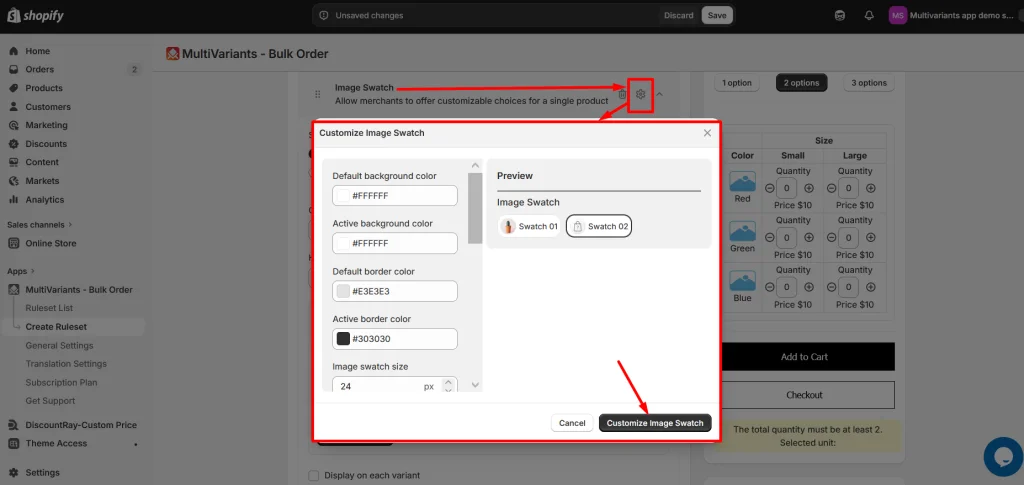
>> To restyle the Image Swatch option, click the gear icon at the top right of the option card and adjust the border colors, background, text color, border radius, and swatch size. Click Customize to apply.
Common Issues
Image swatches are not showing on the product page
Make sure the product is included in the ruleset where you created the Image Swatch option. Also confirm that the MultiVariants app block or app embed required for your storefront setup is active.
The uploaded image is not displaying
Check that the image uses a supported file format and does not exceed the maximum upload size. Try uploading the image again if it does not appear correctly.
Customers can select more than one swatch
Check the selection type in the Image Swatch settings. Choose Single choice swatch if customers should select only one option.
Customers can add the product without selecting a swatch
Set Required to Yes if customers must select an Image Swatch option before adding the product to the cart.
The image swatch appears in the wrong position
Check the Product Options placement setting and choose whether the option should appear above or below the MultiVariants listing.
Need Help?
If the Image Swatch option does not appear on the storefront, the swatch images do not display correctly, or you need help with the setup, contact the MultiVariants support team. Our support team will be happy to help you.
You can always reach us via
💬 Live Chat: in MultiVariants app
📧 Email: support@multivariants.com
📅 Live Meeting: https://calendly.com/efolisupport
Let your customers order multiple variants and quantities of the same product in just one click. Increase your sales and conversion rate with our bulk ordering solution.