The Date and Time option in MultiVariants lets customers select a date, a time, or both when ordering a product. You can make the selection required, set an available date range, choose which days of the week customers can select, and display one shared picker or a separate picker for each variant.
Before You Start: Make sure the product is included in the ruleset where you want to add the Date and Time option. The option will appear on products that the ruleset applies to.
If you are new to Product Options, first see how to set up Product Options in MultiVariants
How to Set Up a Custom Date and Time Option
Follow these steps to add and configure the Date and Time option.
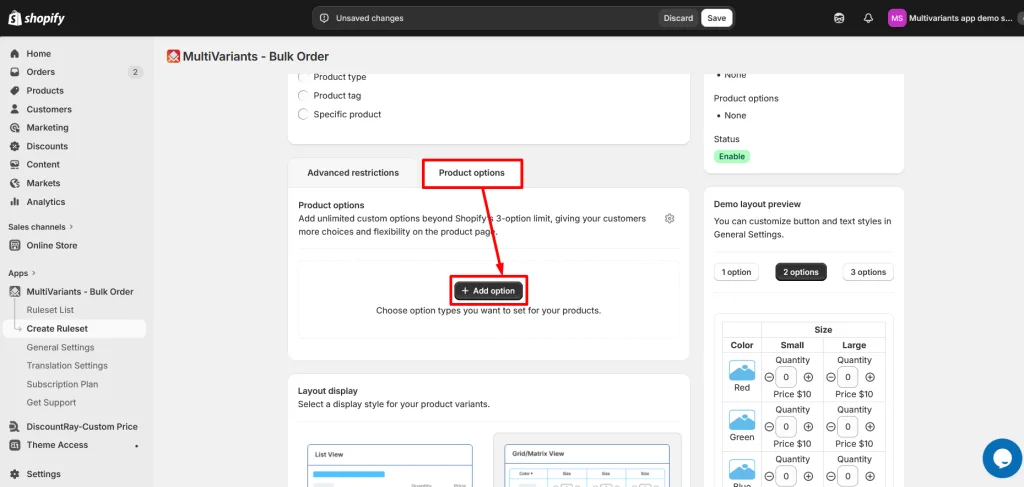
Step#1 Open Product Options
>> Go to the MultiVariants dashboard, open an existing ruleset or create a new one, open the Product Options tab, and click + Add option.
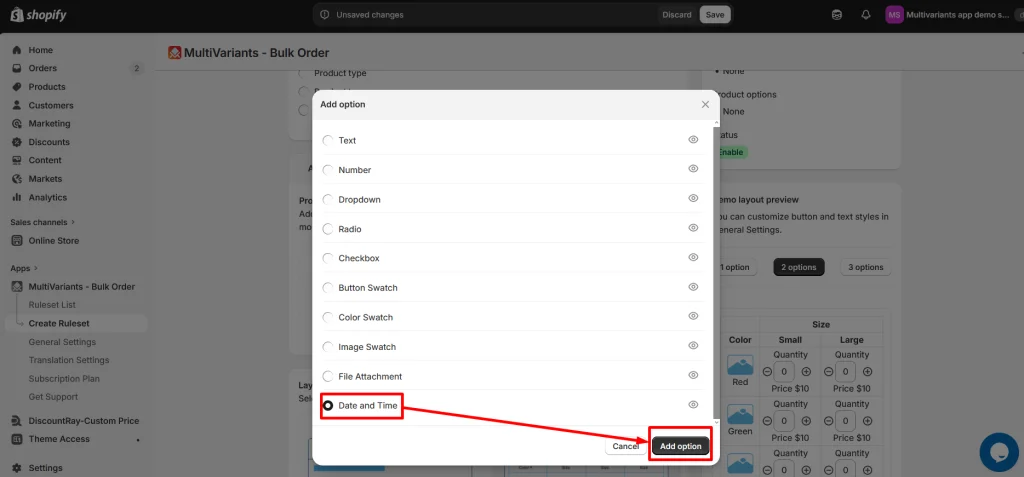
Step#2 Select the Date and Time Option
>> Select Date and Time from the available option types and click Add option.
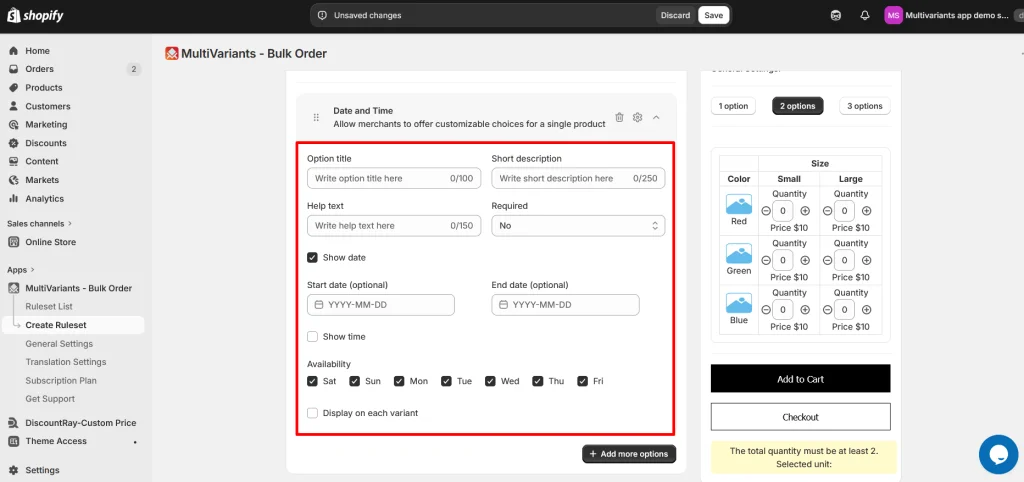
Step#3 Configure the Date and Time Settings
>> Configure the fields you need — only the ones you fill in will apply, the rest stay optional:
Option title — enter the label customers will see above the Date and Time picker, such as “Delivery date” or “Appointment time.”
Short description — add an optional short description to explain what customers should select.
Help text — add optional instructions or supporting information below the Date and Time picker.
Required — set to Yes if customers must select the enabled date or time fields before adding the product to the cart.
Display on each variant — leave this unchecked to show one shared Date and Time picker above the bulk-order section. Check it to display a separate picker under each variant row so customers can select a different date or time for each variant.
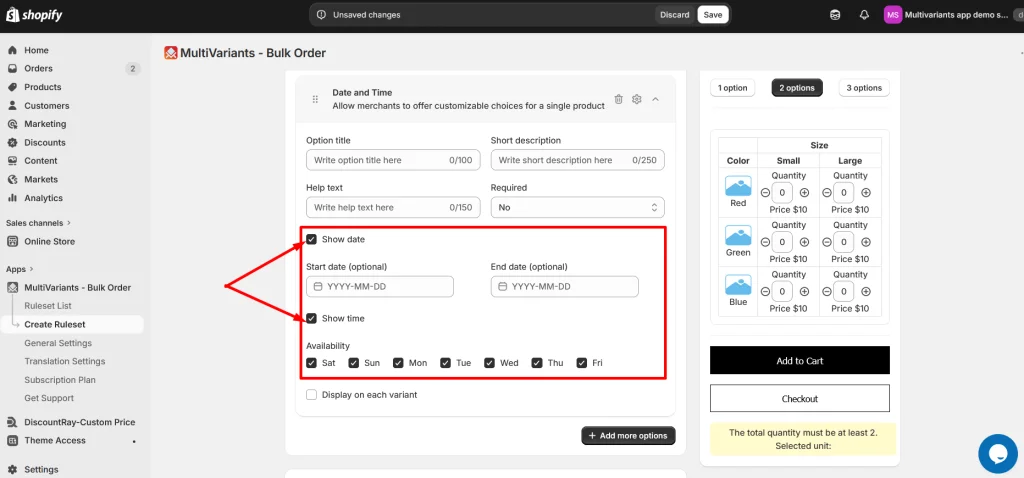
Step#4 Choose Whether to Show Date, Time, or Both
>> Pick what to show:
Show date — enable this to display a date picker for customers.
Show time — enable this to display a time picker for customers.
You can show one or both. At least one of these settings must be enabled for the Date and Time option to display an input on the storefront.
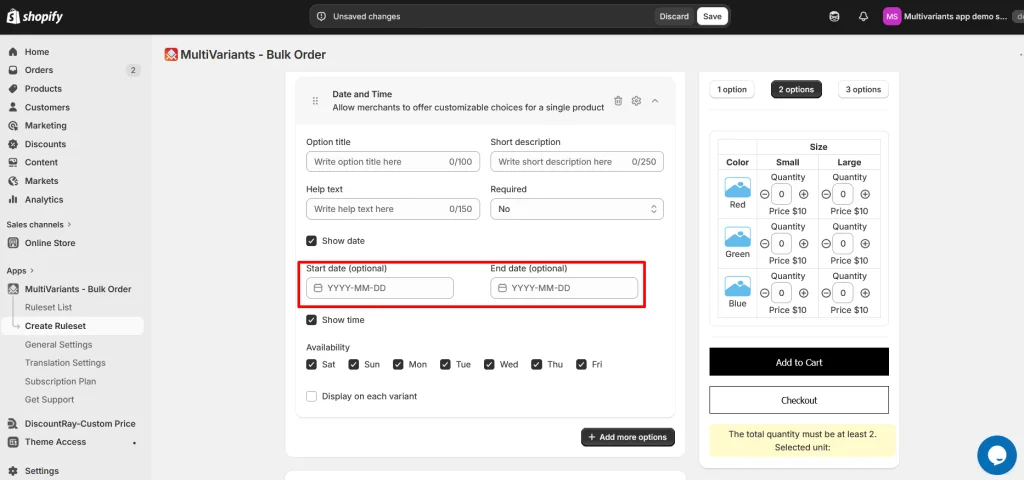
Step#5 Set the Available Date Range
>> Restrict the date range (optional):
Start date — set the earliest date customers are allowed to select.
End date — set the latest date customers are allowed to select.
If you leave both fields blank, customers can select any available future date.
Step#6 Choose the Available Days
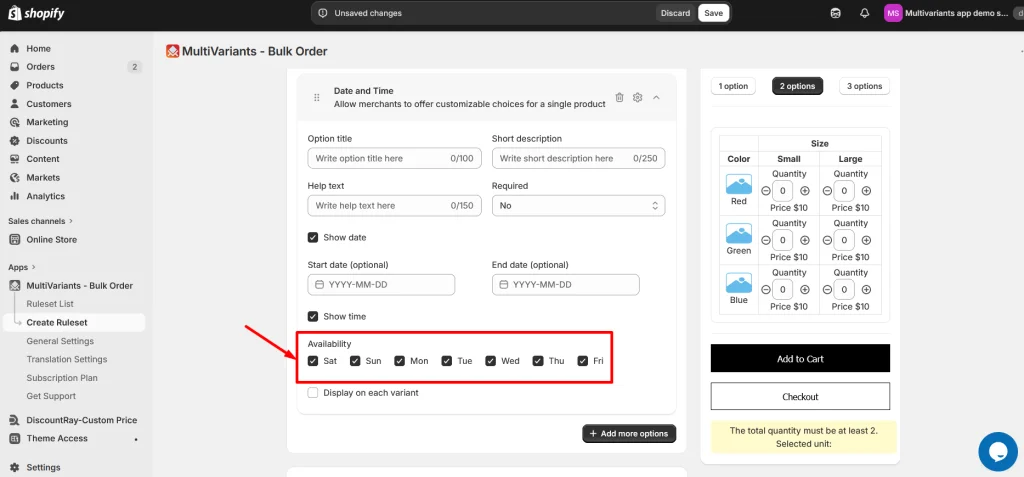
>> In the Availability section, select the days of the week customers are allowed to choose. All seven days are selected by default. Uncheck any unavailable days. For example, Sunday and Monday if you do not accept bookings or deliveries on those days.
Example: For weekday deliveries, enable Show date, set your available date range, and leave only Monday through Friday selected under Availability.
Step#7 Save the Date and Time Option
>> Click Save in the top save bar after reviewing the Date and Time settings.
Step#8 Test the Date and Time Option on Your Storefront
Open a product page where the ruleset applies and test the Date and Time option. Confirm that the correct picker appears, unavailable dates or days cannot be selected, required selections are enforced, and the selected date or time is carried with the product when it is added to the cart.
Manage Date & Time Placement and Styling
Add Another Product Option
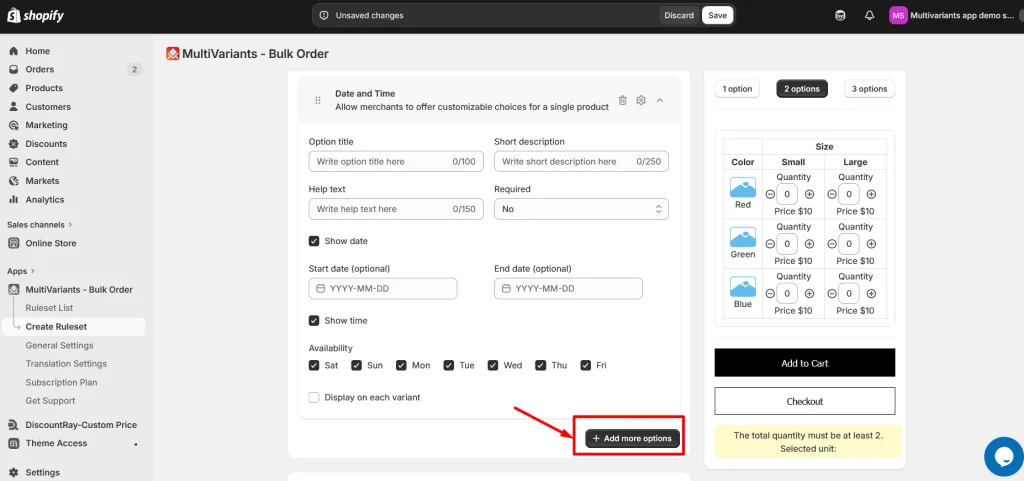
>> Click + Add more options if you want to add another Product Option to the same ruleset.
Choose the Date and Time Option Placement
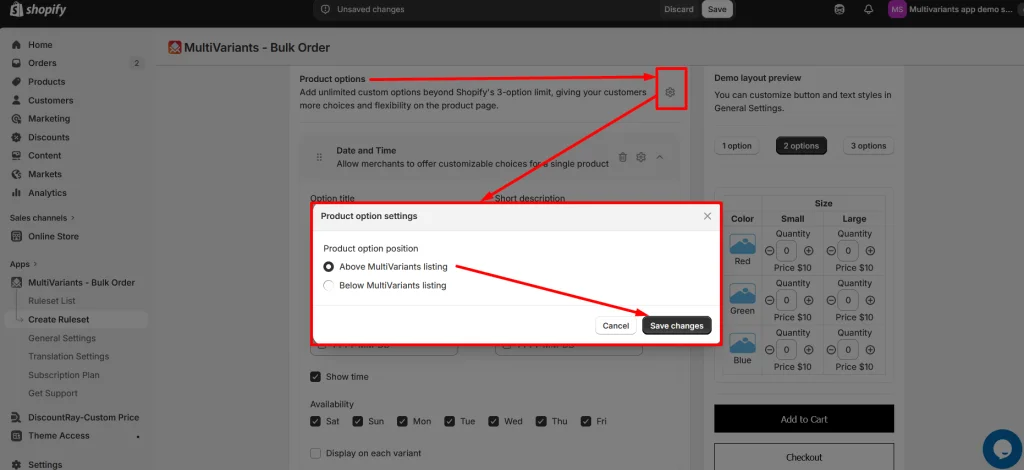
Placement — determines whether the Date and Time option appears above or below the MultiVariants listing on the product page.
>> Click the gear icon at the top of the Product Options tab, select Above MultiVariants listing or Below MultiVariants listing, and click Save changes.
Customize the Date and Time Option Style
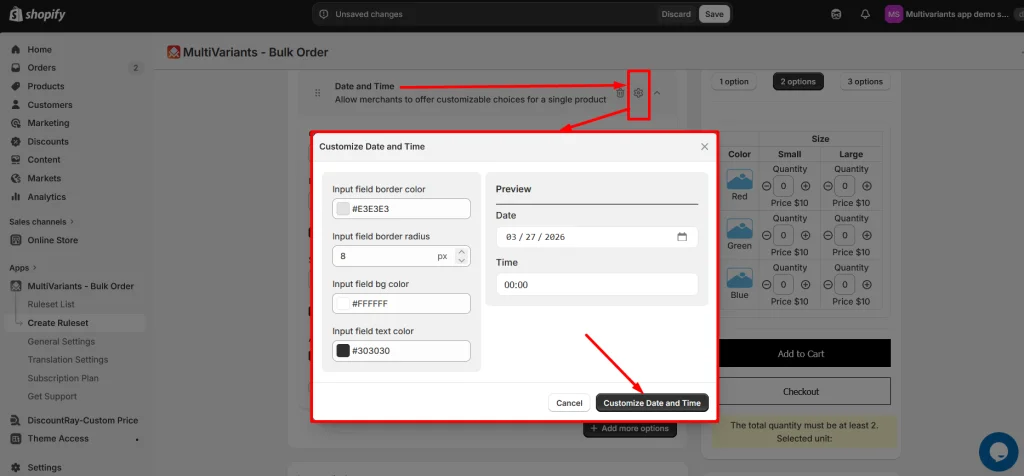
>> Click the gear icon at the top-right of the Date and Time option card to adjust the available styling settings, including border colors, background, text color, and border radius. Click Customize to apply the changes.
Common Issues
The Date and Time option is not showing on the product page
Make sure the product is included in the ruleset where you created the Date and Time option. Also confirm that Show date, Show time, or both are enabled.
Customers can add the product without selecting a date or time
Check the Required setting. Set it to Yes if customers must complete the enabled Date and Time fields before adding the product to the cart.
Customers can select a day when my store is unavailable
Open the Availability settings and uncheck the days customers should not be allowed to select.
Customers can select dates outside the period I want
Check the Start date and End date settings and make sure the allowed date range is configured correctly.
I need a different date or time for each variant
Enable Display on each variant. This displays a separate Date and Time picker under each variant row instead of using one shared selection for the entire product.
Need Help?
If the Date and Time option does not appear on the storefront, date restrictions are not working as expected, or you need help configuring the option, contact the MultiVariants support team.
You can always reach us via
💬 Live Chat: in MultiVariants app
📧 Email: support@multivariants.com
📅 Live Meeting: https://calendly.com/efolisupport