The Date and Time option lets your customers pick a date, a time, or both — perfect for delivery scheduling, event bookings, appointment scheduling, or any time-sensitive customization. You can also restrict the date range and limit which days of the week are bookable.
To set up the Date and Time option, follow these steps:
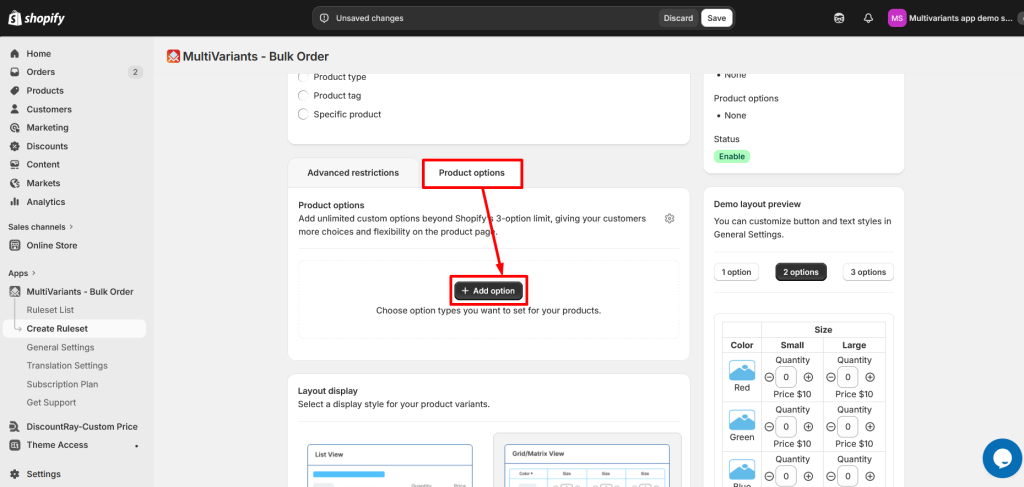
>> Go to the MultiVariants dashboard, open an existing ruleset (or create a new one), open the Product Options tab at the bottom, and click “+ Add option“.
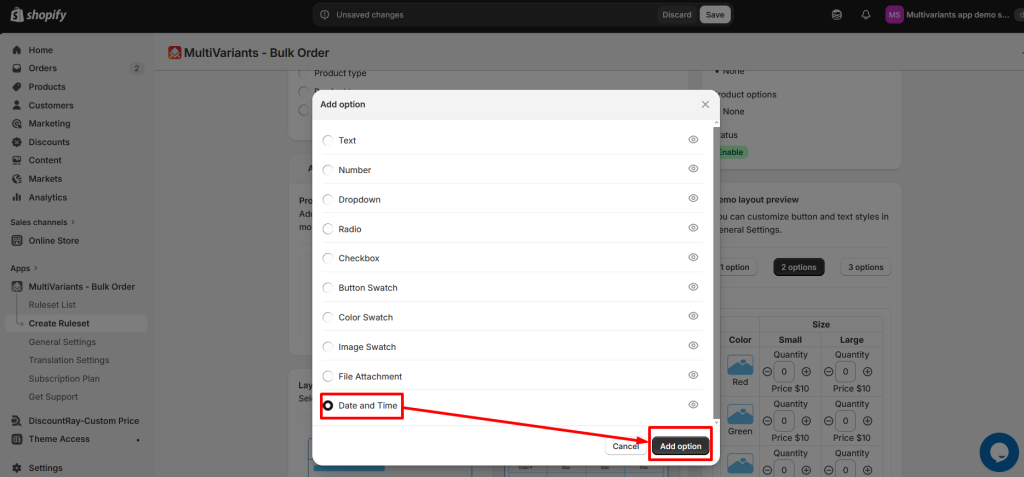
>> Select Date and Time and click Add option.
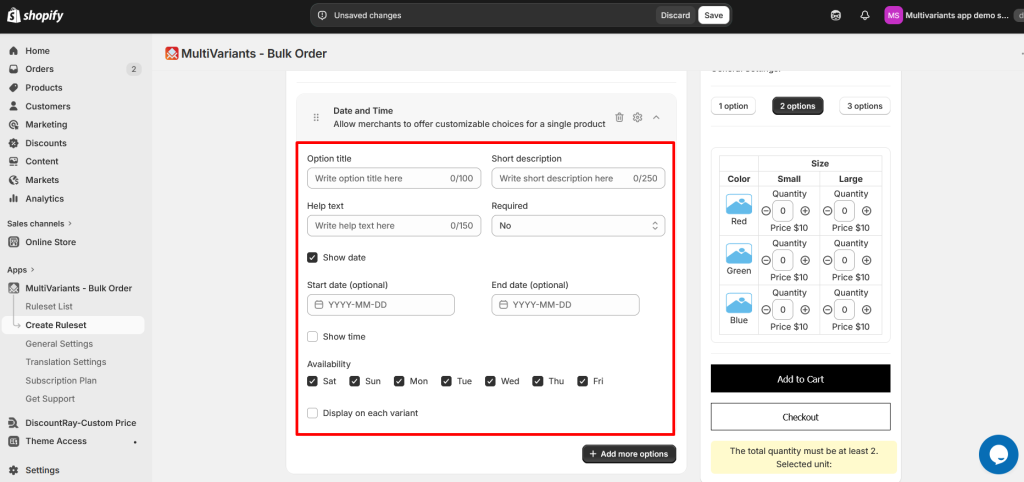
>> Configure the fields you need — only the ones you fill in will apply, the rest stay optional:
- Option title — the label shown above the picker, e.g. “Delivery date”.
- Short description — optional one-liner for context.
- Help text — optional helper line below the picker.
- Required — set to Yes if the customer must pick a date/time.
- Display on each variant — leave unchecked to show one date/time picker at the top of the bulk-order section, shared across all variants. Check it to repeat the picker under each variant row, so the customer can pick a different date/time per variant.
>> Pick what to show:
- Tick Show date to give your customer a date picker.
- Tick Show time to give your customer a time picker.
You can show one or both. If both are unticked, the option won’t render anything.
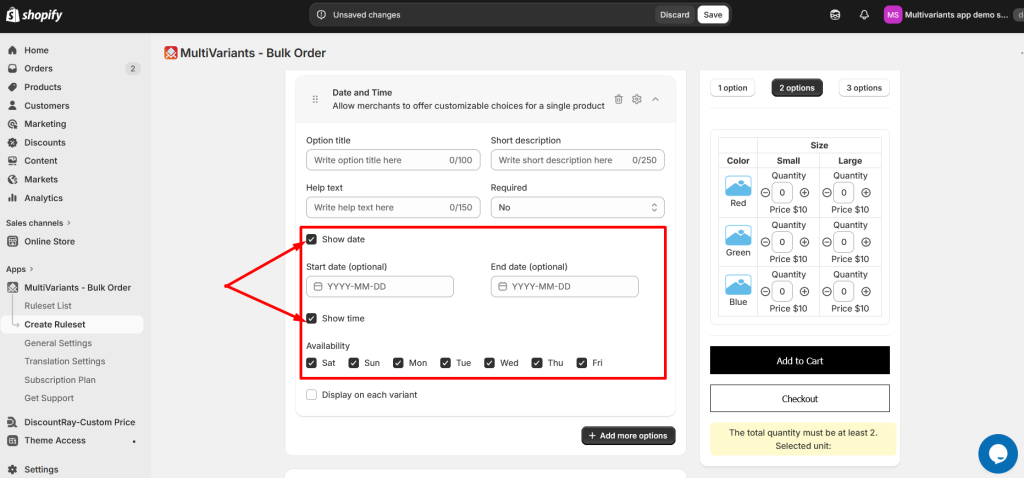
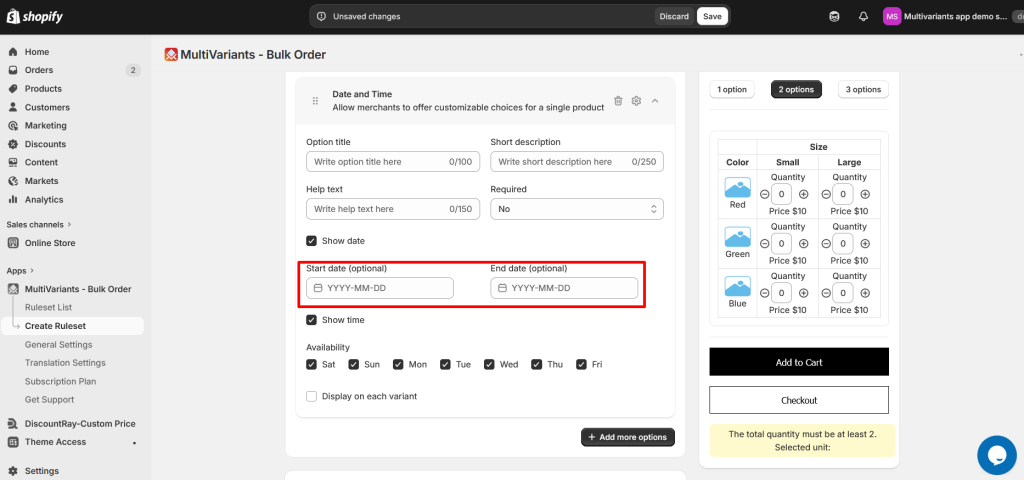
>> Restrict the date range (optional):
- Start date — the earliest date the customer can pick.
- End date — the latest date the customer can pick.
If both are blank, customers can pick any future date.
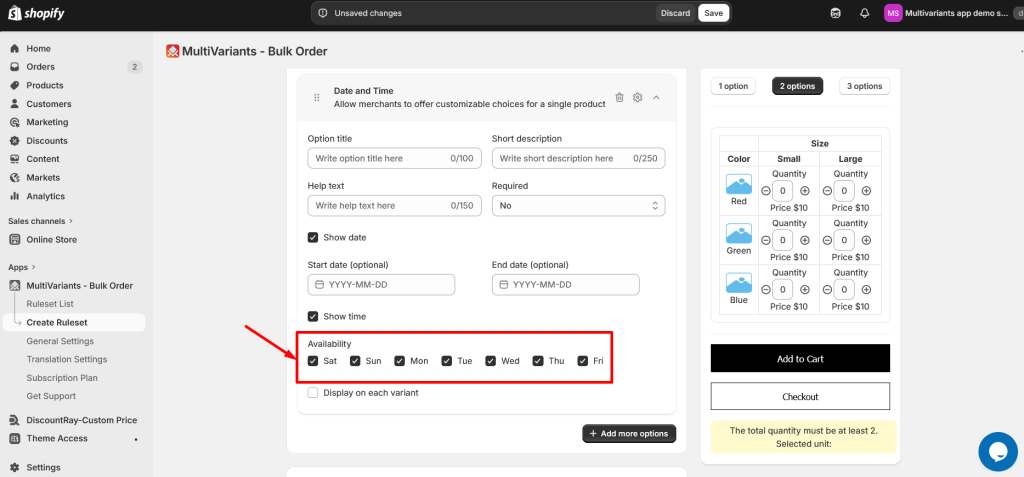
>> In the Availability section, tick the days customers can pick. By default all 7 days are checked. Untick any day you don’t want available — for example, untick Sunday and Monday if your store is closed those days.
>> Click Save in the top save bar.
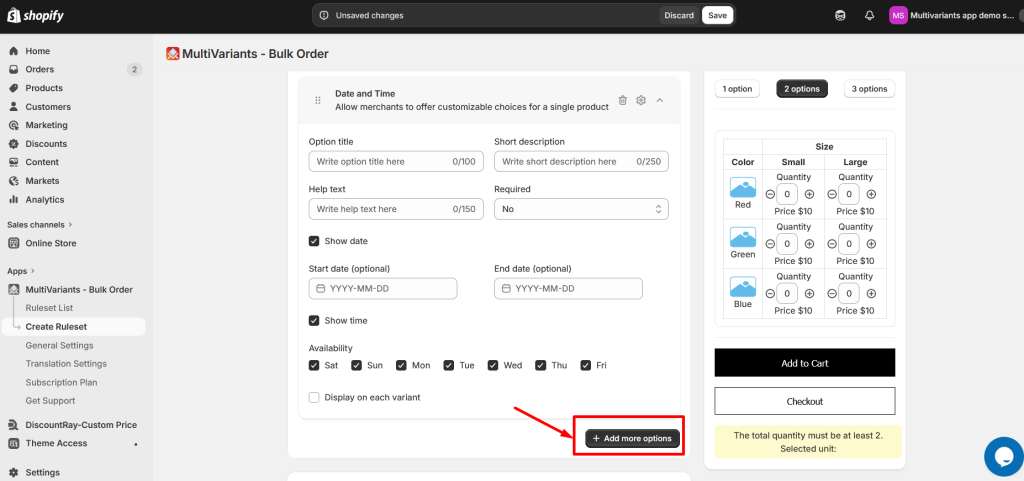
Your Date and Time option is now live on every product the ruleset applies to. You can also add more options by clicking the + Add more options button, and adjust the design and placement of the option by following the steps below.
>> To add another option, click + Add more options at the bottom.
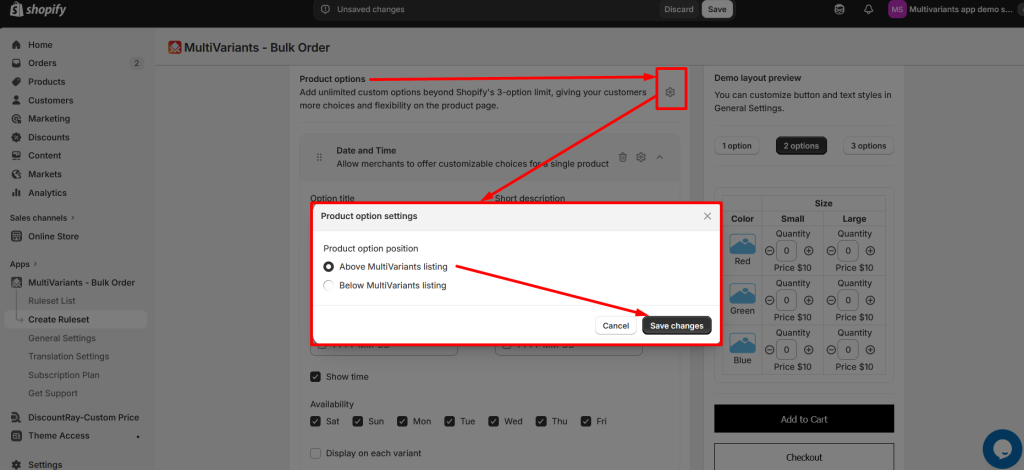
>> To choose where the Date and Time option appears on the product page, click the small gear icon at the top of the Product Options tab, select Above or Below MultiVariants listing, and click Save changes.
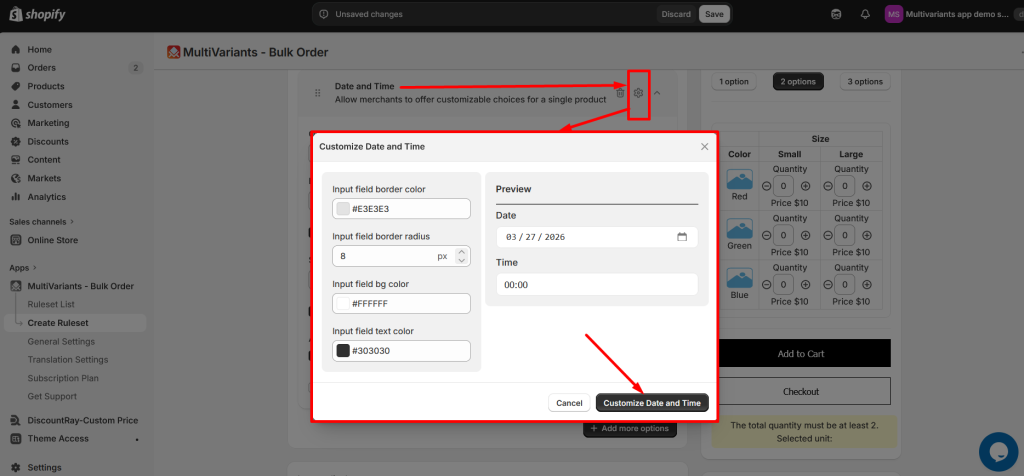
>> To restyle the Date and Time option, click the gear icon at the top right of the option card and adjust border colors, background, text color, and border radius. Click Customize to apply.
Need Help? #
Still, if you face any further issues or need help, feel free to contact us. Our support team will be happy to help you.
You can always reach us via
- 💬 Live Chat: in MultiVariants app
- 📧 Email: support@multivariants.com
- 📅 Live Meeting: https://calendly.com/efolisupport
Good luck, and happy selling with MultiVariants! 🚀


